Project Exchange
ACTIVITY: Metaphor Machine Blueprint Series
Project: Metaphor Machines
SUMMARY
Goals
Details
Assessments: Group work, Other (enter below)
Additional Assessment Type: Visual Presentation
Description
Students complete a series of several blueprints for their Metaphor Machines, based on their Concept Proposals (they will have already decided the functions, metaphors, and supplies needed for their machine). Below are step-by-step instructions for students, and underneath is the Blueprint Series Description.
SIX STEPS TO BLUEPRINT SERIES:
1. Each individual draws a Rough Sketch of what they think the machine should look like, based on the group's work so far.
2. Group members workshop their images and revise them.
3. Group members present their Final Sketch for the realization of the machine, give their "pitch" to the group, and the group votes on which image they will base their blueprint on.
4. 2 group members are chosen to be the "Architects", and they complete a Full-Sized Draft.
5. Architects check in with group and with teacher for comments.
6. Architects complete Final Blueprint.
BLUEPRINT SERIES REQUIREMENTS:
1. ROUGH SKETCH: Every individual completes this on graph paper, in pencil. The sketch must depict the 3-5 functions decided upon by the group, made of the materials decided upon, keeping in mind the size of the base.
2. FINAL SKETCH: Every individual completes this on graph paper, in pencil, using rulers. The sketch must depict the 3-5 functions decided upon by the group, made of the materials decided upon, keeping in mind the size of the base. Final sketch must reflect the comments made by the group, and be TO SCALE.
3. FULL-SIZED DRAFT: only 2 members of a group of 4 need to complete this, on large butcher paper, in pencil, using yardsticks. Along with sketch requirements, additional requirements are:
-Every function in the image must be numbered in chronological order
-A key must be included somewhere on the blueprint
-Image and key must together take up the whole sheet
KEY: for EACH numbered function...
a. Physical Description: What is happening? (the marble drops into the water and the water splashes up)
b. Metaphorical Description: What does this represent? (When the monarchy taxed the peasants, they protested and began to fight back)
4. FINAL BLUEPRINT: only architects complete this, first in pencil, with yardsticks, and then in pen, on the fanciest large paper you can muster. Must include all of the above requirements, including including revisions from any comments from the group and teacher. Professionalism is important. These will guide construction, and will hang above their machines on exhibition night.
ACTIVITY RESOURCES
(e.g. rubrics, examplars, websites, etc.)
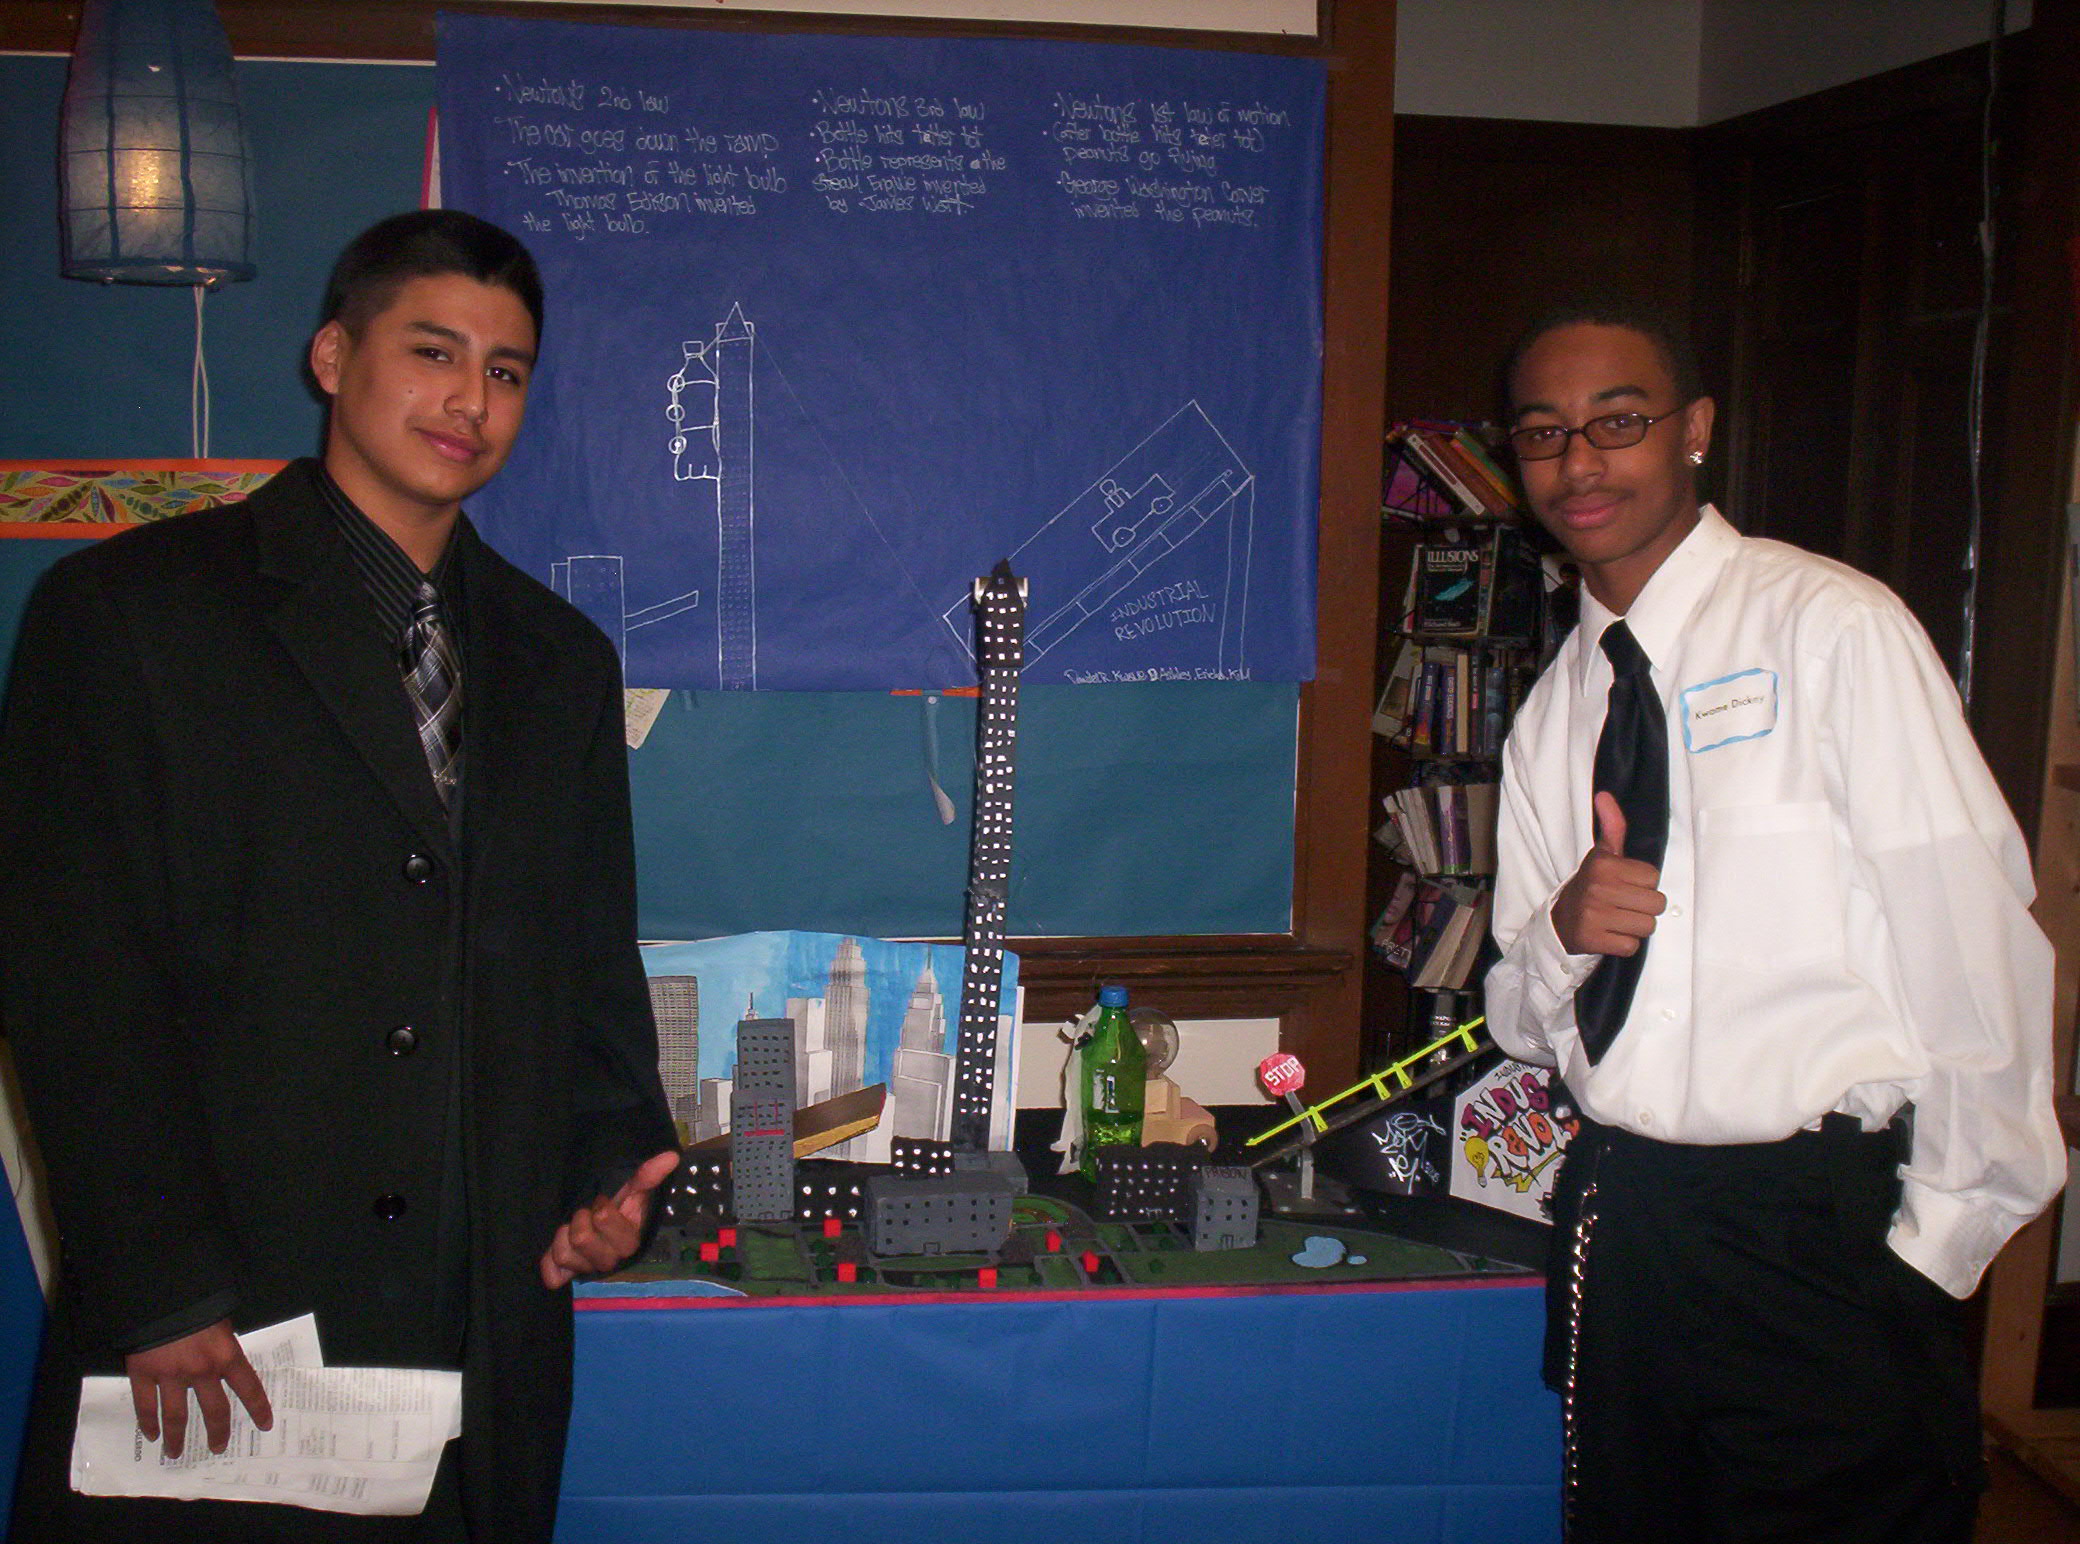
Picture
Here is an example blueprint, showing how we displayed them on exhibition night....
Download (655K)
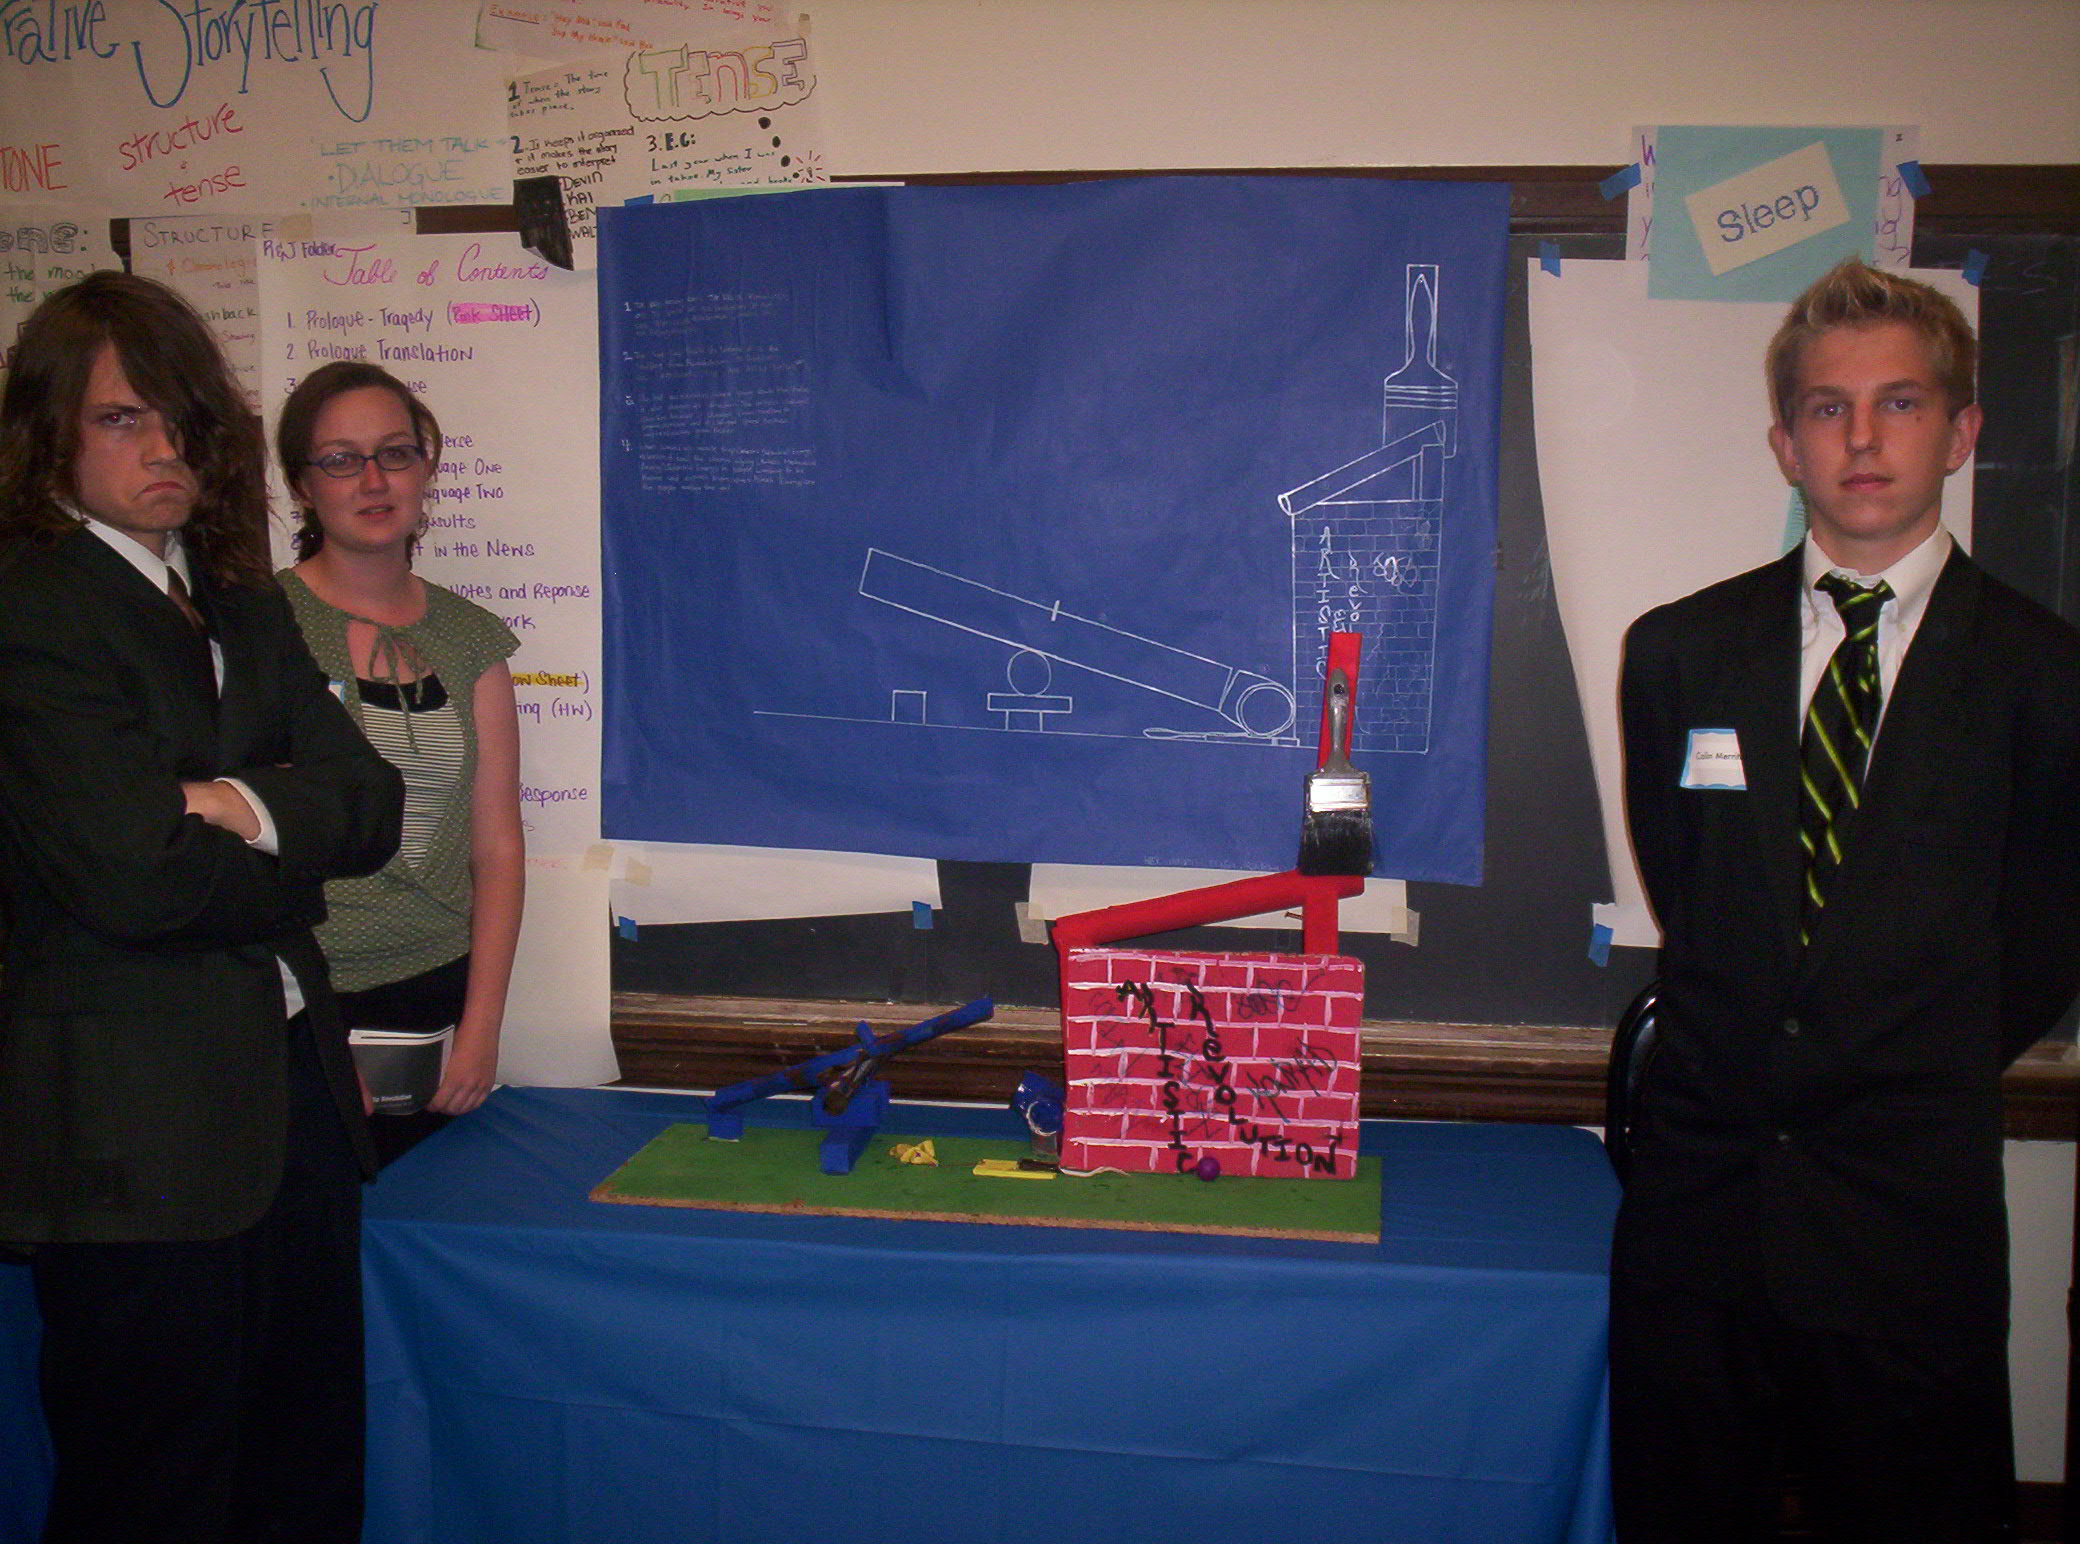
Picture 2
Here is an example blueprint, showing how we displayed them on exhibition night....
Download (676K)
REFLECTIONS & COMMENTS
Author Reflections
It is important that students are creative and practical during this process, and they will wow you. The meeting with the architects & the teacher before the final is created is very important, and the final draft must include all revisions. Some students created guillotines, or one-way streets to show the lack of social mobility, or painted parts of the machine like country's flags. Encourage this thinking and give examples of embellishment in the architect meetings. Their final blueprint should show an impressive, to scale outline image of a "buildable" machine, and a corresponding key with historical & scientific rationale for each function. This has a lot of potential as a math assessment, and is currently under development. Ideally, students must plug the numbers from their machine (velocity, velocity, kinetic energy, etc) into physics equations learned in math class, and include them on their blueprints.
MATERIALS:
graph paper
blueprint/butcher/other large paper
rulers & yardsticks
plenty of pencils/erasers
ink pens for final draft